Harriet Birrell

Nourish magazine issue 76
Buy Now
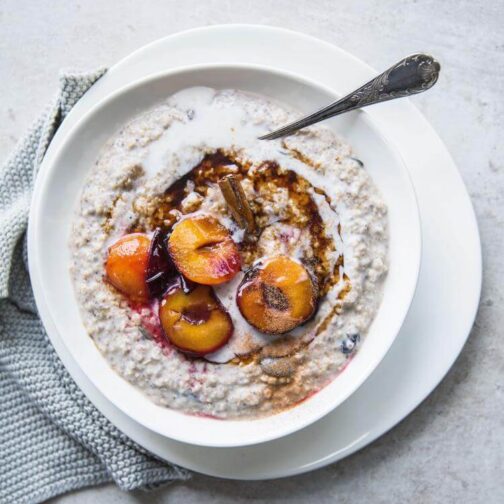
One weekend, I decided to add some frozen berries to my porridge mix and bake it instead of cooking it on the stovetop. It turned out so good and...
These pancakes are the perfect breakfast staple. No blender or food processor needed. Bonus! They are filling and delicious, and offer an...
This loaf is completely grain free and gluten-free, meaning it’s suitable for those with intolerances. Buckwheat is a seed not a grain. It is...
A little know-how is all you need to avoid chemical-laden commercial cleaners and instead make your own non-toxic, household cleaners that are...
This is the the most delicious vegan mushroom burger we have ever made! It won't fall apart, is totally satisfying and bursting with flavour!
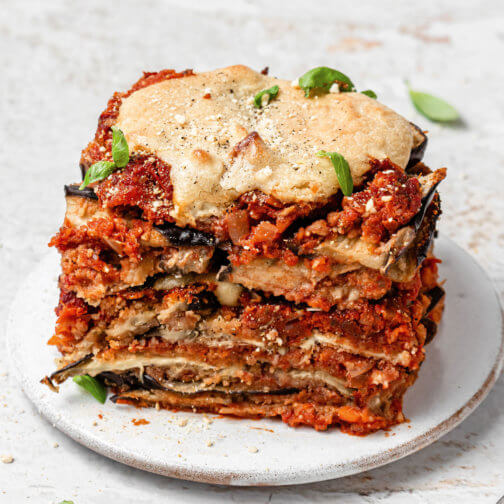
A luscious, flavoursome, wholefoods, gluten-free parmigiana that packs a 'nut'ritious protein punch.
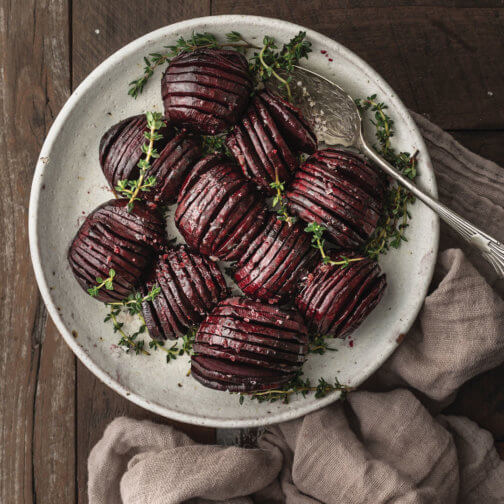
The rich colour of beetroot combined with the hasselback-style slicing make this nutritious side dish as pretty as it is tasty.
This fruity cocktail is a sweet summer drink that’s super easy to make. The combination of strawberry ice cream and coconut milk makes for a...
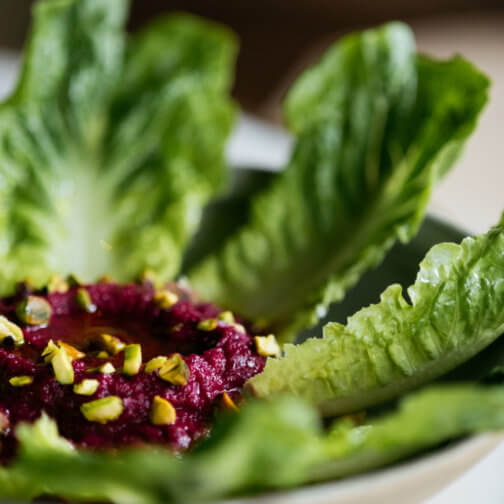
This delicious yoghurt dip is so simple to make and will definitely keep you coming back for more!
Quinoa is gluten free, high in protein and fibre, and is low GI, meaning it is slowly digested for longer-lasting energy.
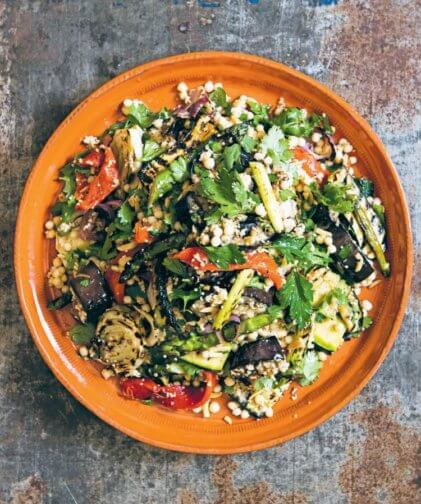
Add a layer of smokiness to your vegetables with this chargrilled salad.
If you want to get your gut in order, Dr Will Bulsiewicz is the expert to help you sort out fact from fiction. This is the gut-health cheat sheet...
In the fast-paced and demanding world we live in, finding moments of stillness and calm can be challenging. In an attempt to find a little peace...
Does life feel like an uphill battle? Maybe it’s time for change
Spraying sheets and pillows with calming scents can be a wonderful aid to slumber
The next time you go for a walk, discover the wonder of the everyday world around you
A skincare routine can be a way to nourish yourself inside and out
When the clouds converge, practise gratitude for the smallest of glimmers, and learn to dance in the rain.
One weekend, I decided to add some frozen berries to my porridge mix and bake it instead of cooking it on the stovetop. It turned out so good and is actually much easier!
If you want to get your gut in order, Dr Will Bulsiewicz is the expert to help you sort out fact from fiction. This is the gut-health cheat sheet...
In the fast-paced and demanding world we live in, finding moments of stillness and calm can be challenging. In an attempt to find a little peace...
Does life feel like an uphill battle? Maybe it’s time for change
Spraying sheets and pillows with calming scents can be a wonderful aid to slumber
The next time you go for a walk, discover the wonder of the everyday world around you
A skincare routine can be a way to nourish yourself inside and out
When the clouds converge, practise gratitude for the smallest of glimmers, and learn to dance in the rain.
These pancakes are the perfect breakfast staple. No blender or food processor needed. Bonus! They are filling and delicious, and offer an alternative to bananas in wholefood, plant-based pancakes.
TIP: When berries aren’t in season, frozen ones are a great option. Just defrost them first and use as you would fresh ones.
If you want to get your gut in order, Dr Will Bulsiewicz is the expert to help you sort out fact from fiction. This is the gut-health cheat sheet...
In the fast-paced and demanding world we live in, finding moments of stillness and calm can be challenging. In an attempt to find a little peace...
Does life feel like an uphill battle? Maybe it’s time for change
Spraying sheets and pillows with calming scents can be a wonderful aid to slumber
The next time you go for a walk, discover the wonder of the everyday world around you
A skincare routine can be a way to nourish yourself inside and out
When the clouds converge, practise gratitude for the smallest of glimmers, and learn to dance in the rain.
This loaf is completely grain free and gluten-free, meaning it’s suitable for those with intolerances. Buckwheat is a seed not a grain. It is gluten-free, packed with nutrients, and delicious. For this recipe, we use it in its whole form, which makes a hearty loaf full of goodness and rich in fibre.
If you want to get your gut in order, Dr Will Bulsiewicz is the expert to help you sort out fact from fiction. This is the gut-health cheat sheet...
In the fast-paced and demanding world we live in, finding moments of stillness and calm can be challenging. In an attempt to find a little peace...
Does life feel like an uphill battle? Maybe it’s time for change
Spraying sheets and pillows with calming scents can be a wonderful aid to slumber
The next time you go for a walk, discover the wonder of the everyday world around you
A skincare routine can be a way to nourish yourself inside and out
When the clouds converge, practise gratitude for the smallest of glimmers, and learn to dance in the rain.
A little know-how is all you need to avoid chemical-laden commercial cleaners and instead make your own non-toxic, household cleaners that are just as effective.
I started considering the products I was using at home about seven years ago. At the time, my partner, Fraser, and I were operating a small, seasonal smoothie and raw desserts caravan in our hometown. The more I began to appreciate how food was grown and processed, the more I wanted to eat food as close to its natural, ‘whole’ state as possible, free of chemicals and preservatives. That passion for natural, plant-based living drove me to question the everyday products I used in our home.
I was shocked to discover synthetic preservatives in almost all of my store-bought cleaning products, along with loads of ingredients I couldn’t identify. Even worse – some were known to be harmful. I’ve since learned that manufacturers can get away with a lot by using labels and terms that mask what a product contains. The simple word ‘parfum’ or ‘fragrance’, for example, can be a front for thousands of chemicals that are known endocrine disruptors. These vague labels make it close to impossible for us to truly know what’s in the products we are using. No, thanks!
Armed with this knowledge, I started looking for products free of chemicals that can harm people and planet. This is a tedious and often confusing task, made more so by a large amount of greenwashing. Unfortunately, there are conventional and synthetically fragranced products that pose as ‘earth friendly’, ‘eco’, or ‘natural’ when they are, in fact, not. Our skin is our largest organ, and much of what comes into contact with it is absorbed right into the blood stream. If we avoid spraying synthetic pesticides and herbicides on our food, why would we spray products that are equally harmful in our homes?
Motivated by my frustration with commercial cleaners, I decided to explore homemade cleaning products that I could be certain contained no nasties.
There are plenty of benefits to making your own home cleaning products from natural ingredients. Not only do they smell better, they are also less irritating to skin and eyes. Replacing the noxious and lingering odours of synthetic fragrances with pure essential oils is like stepping into a new, genuinely fresh world.
Making your own simple, natural products means you will know (and be able to pronounce!) every ingredient that goes into them. You can tackle any cleaning task knowing that you are not inhaling harsh chemicals or getting anything potentially harmful on your skin and adding to its toxic load. Get creative and customise your household cleaners to your liking. Don’t love the smell of pure lavender essential oil? Use orange blossom instead.
Most of the ingredients you’ll need can be purchased in bulk, bypassing packaging altogether. Avoiding all that plastic packaging also gives you the opportunity to tread a little lighter on the Earth. Not to mention that you won’t be pouring toxic chemicals down the drain and, ultimately, into our waterways!
Arming yourself with the basic skills and ingredients to make your own cleaning products means more convenience in the long run. You can store the ingredients at home, making it easy to whip up a fresh batch of a product without having to visit the store. It will save you money and is convenient, environmentally friendly, and gentle on your system! All the better to turn dreaded cleaning chores into enjoyable rituals.
On my path to replacing commercial products with homemade and natural alternatives, I’ve been pleasantly surprised by how effective they are. It is a common misconception that natural equals less powerful, and that we need synthetic chemicals to do most of the grunt work if we want to get things really clean.
The truth is, there are potent cleaning agents that are either minimally processed or in their natural form, such as good old-fashioned bicarb soda and white vinegar. Plus, it’s never a bad idea to remove the toxic load synthetic fragrances can place on our bodies.
In the fast-paced and demanding world we live in, finding moments of stillness and calm can be challenging. In an attempt to find a little peace...
If you want to get your gut in order, Dr Will Bulsiewicz is the expert to help you sort out fact from fiction. This is the gut-health cheat sheet...
Does life feel like an uphill battle? Maybe it’s time for change
Spraying sheets and pillows with calming scents can be a wonderful aid to slumber
The next time you go for a walk, discover the wonder of the everyday world around you
A skincare routine can be a way to nourish yourself inside and out
When the clouds converge, practise gratitude for the smallest of glimmers, and learn to dance in the rain.
This is the the most delicious vegan mushroom burger we have ever made! It won't fall apart, is totally satisfying and bursting with flavour!
This recipe is an edited extract from Natural Harry by Harriet Burrell, published by naturalharry.com.au. Photography by Nikole Ramsay.
If you want to get your gut in order, Dr Will Bulsiewicz is the expert to help you sort out fact from fiction. This is the gut-health cheat sheet...
In the fast-paced and demanding world we live in, finding moments of stillness and calm can be challenging. In an attempt to find a little peace...
Does life feel like an uphill battle? Maybe it’s time for change
Spraying sheets and pillows with calming scents can be a wonderful aid to slumber
The next time you go for a walk, discover the wonder of the everyday world around you
A skincare routine can be a way to nourish yourself inside and out
When the clouds converge, practise gratitude for the smallest of glimmers, and learn to dance in the rain.
Subscription Options
to receive regular Nourish updates and offers directly in your inbox.
Interested in partnerships, submissions or providing more detailed feedback? Please visit our contact us page.
