
Sara Kidd is a vegan pastry chef, author, recipe developer and instructor rocking the vegan baking scene with her eye-popping vegan cake creations, food photography and recipes. Following the wild success of her first cookbook, Bake Vegan Stuff, Easy Recipes For Kids (And Adults! Too), her hotly anticipated follow-up, The Vegan Cake Bible, launched in April 2022.
Articles by Sara Kidd

Food stories
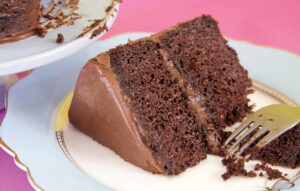
Gluten-free baking hacks
Your cake bakes will rise to the occasion with these vegan and gluten-free baking tips.

Recipe
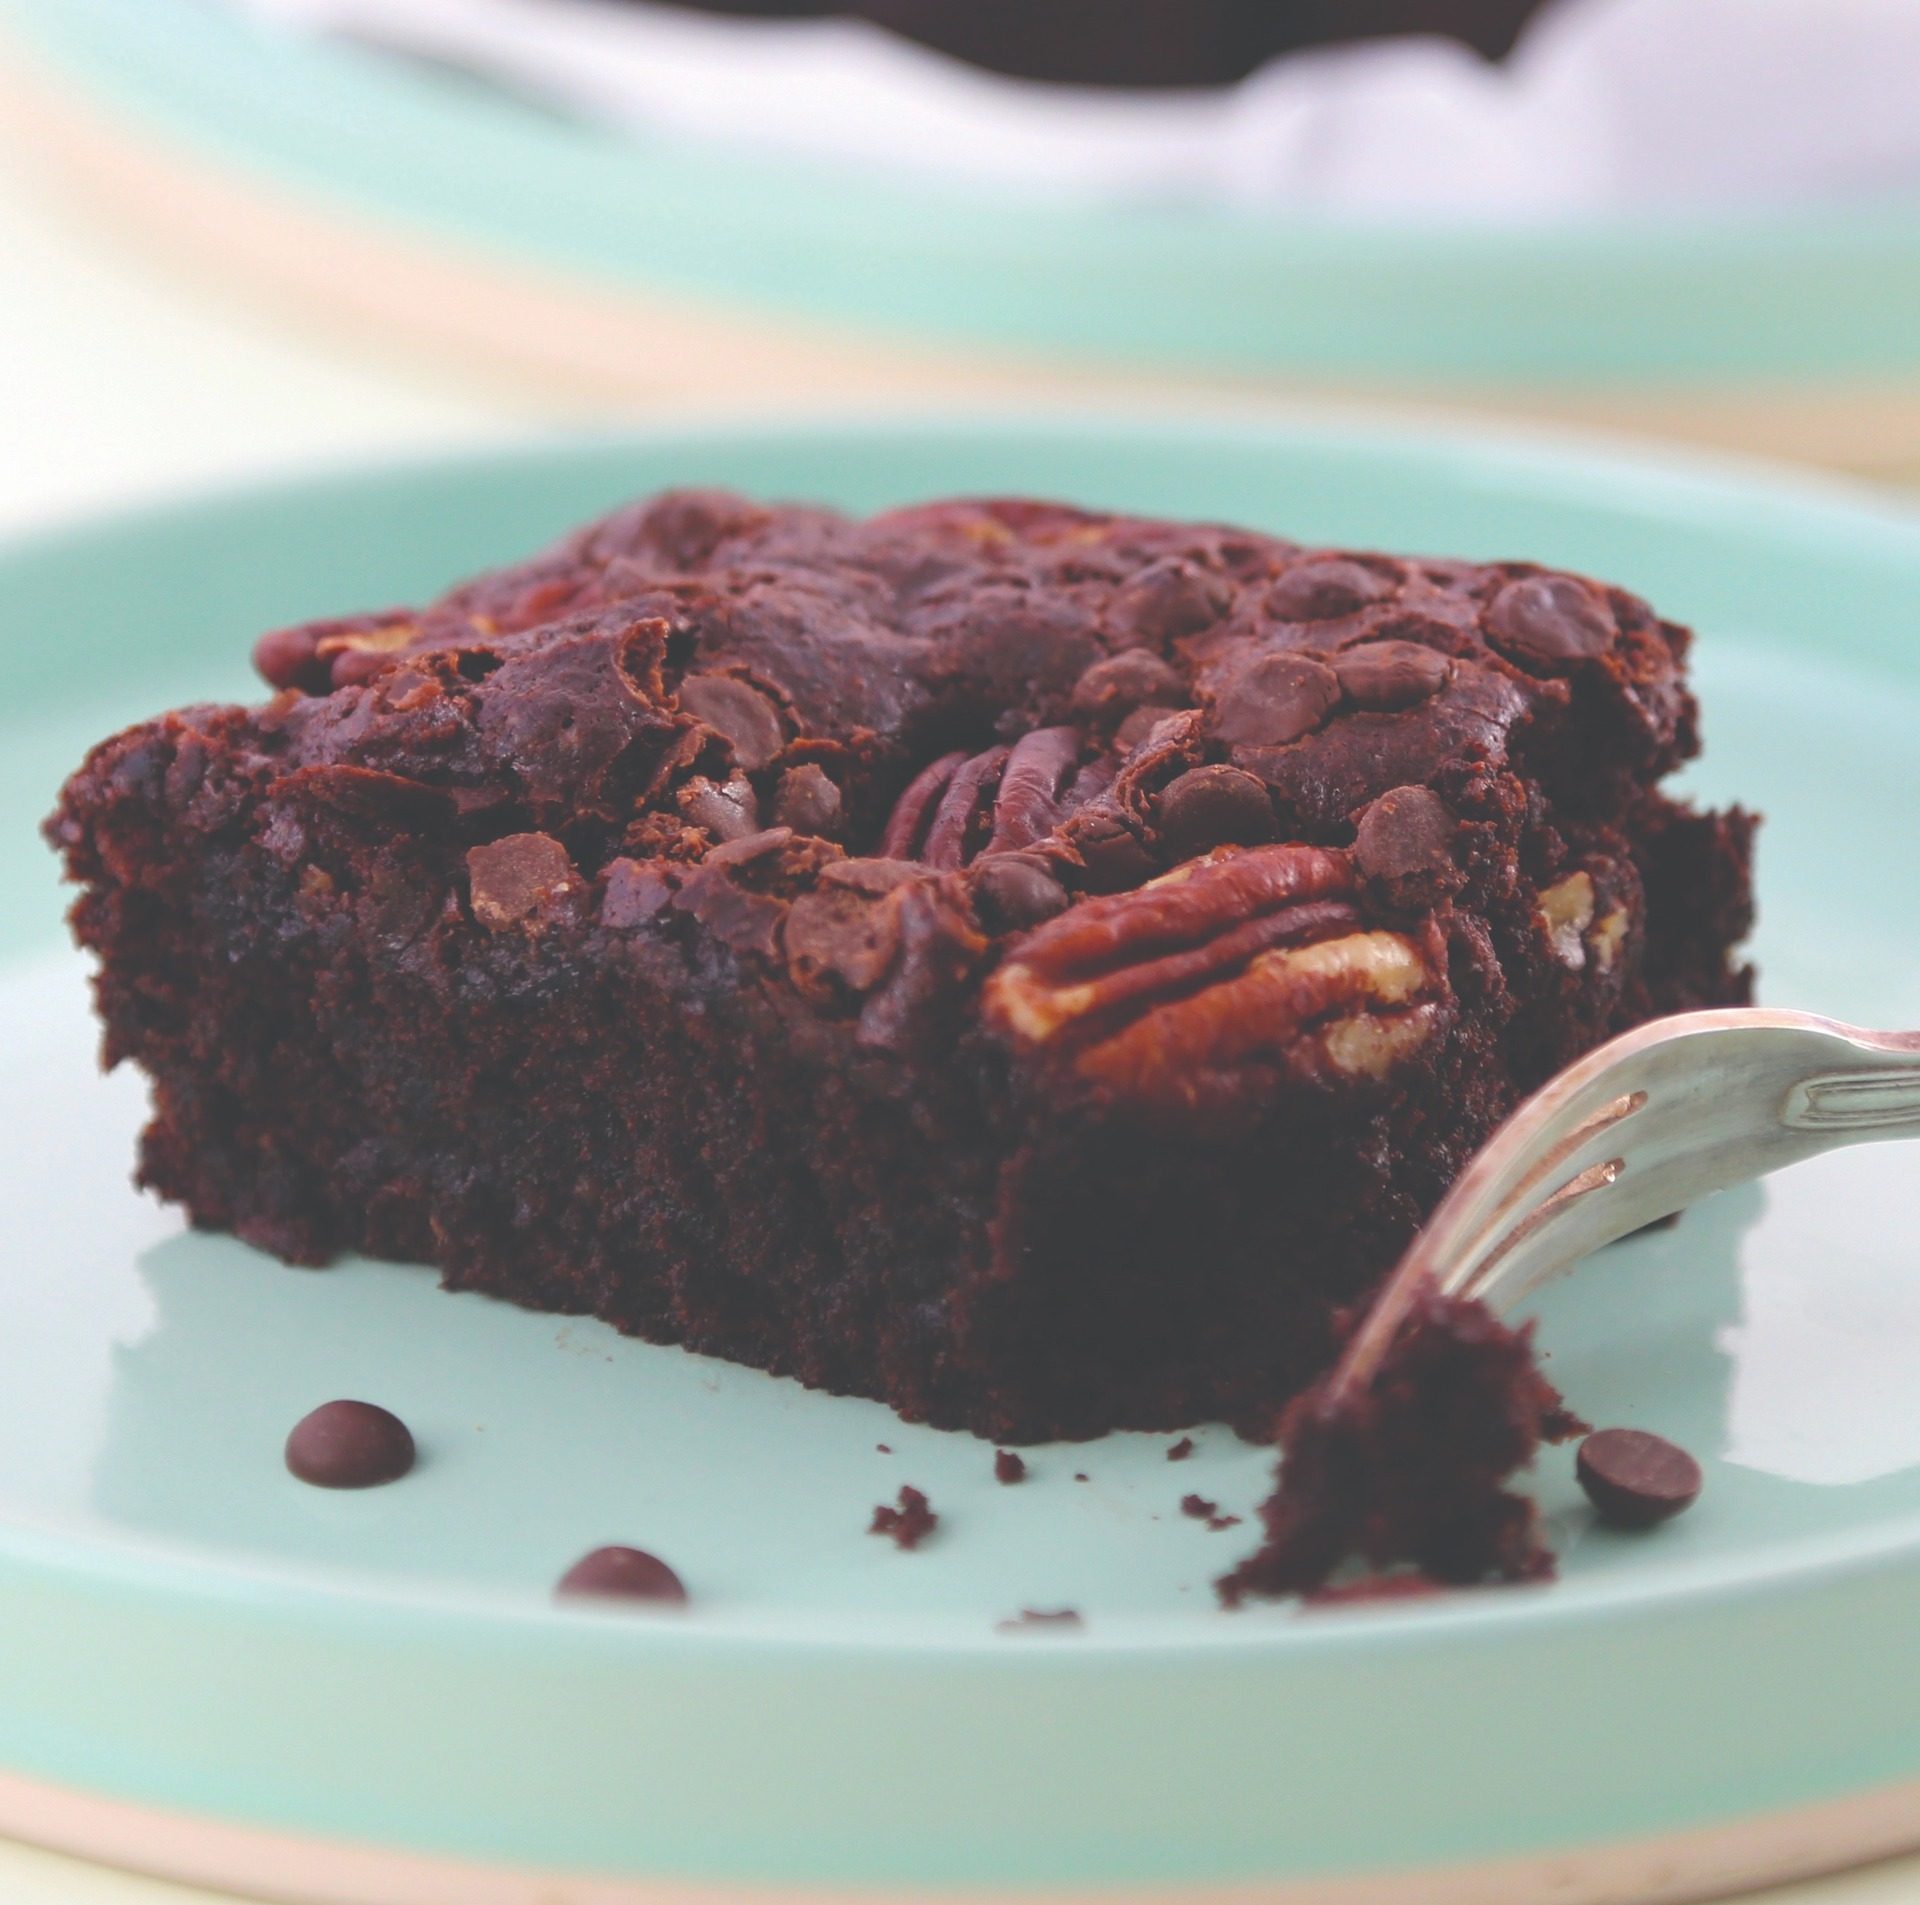
Gluten-free brownies
Nobody should miss out on to-die-for chocolate brownies, and Sara Kidd’s vegan and GF recipe guarantees no-one has to!

Recipe
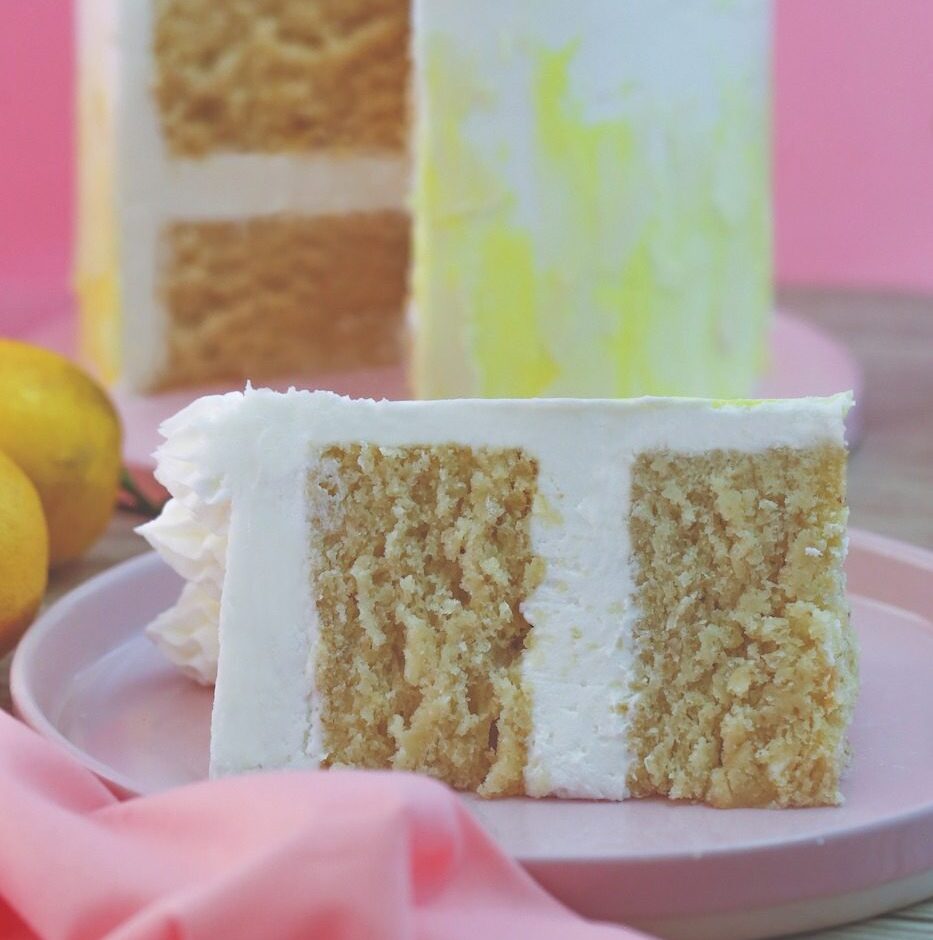
Vegan lemon cake
Afternoon tea, picnic, party, or just because – any excuse is a good excuse to make lemon cake, and this vegan version by baking virtuoso Sara...

Recipe
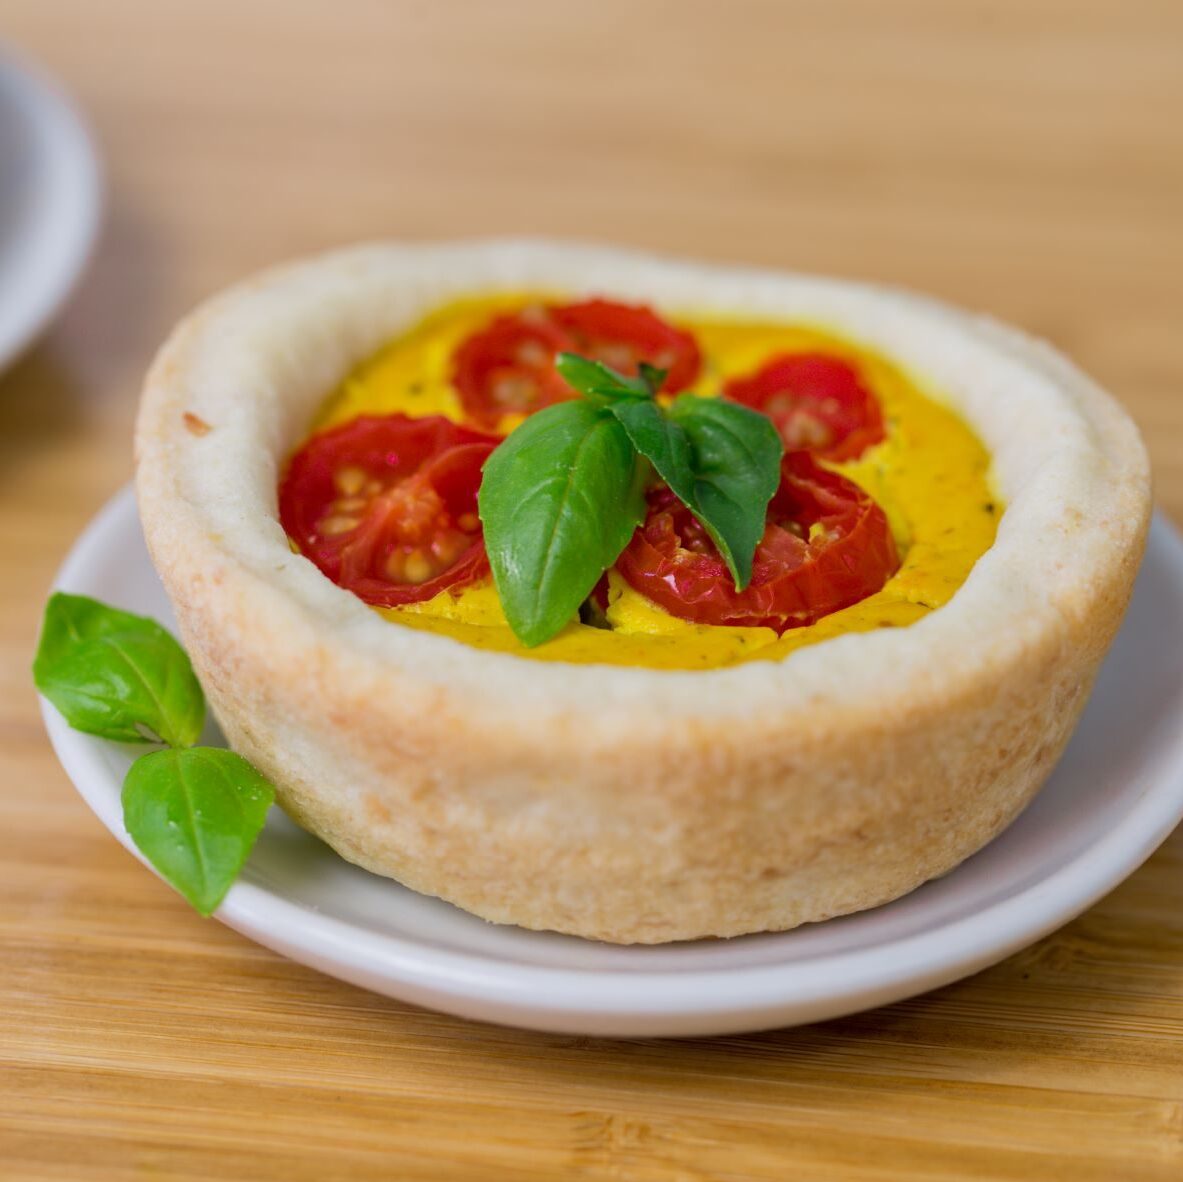
Vegan ‘egg’ and tomato tartlets
Tofu, soy milk and vegan cream cheese form the basis for the egg-style filling in these adorable mini-tarts, complete with melt-in-the mouth...

Recipe
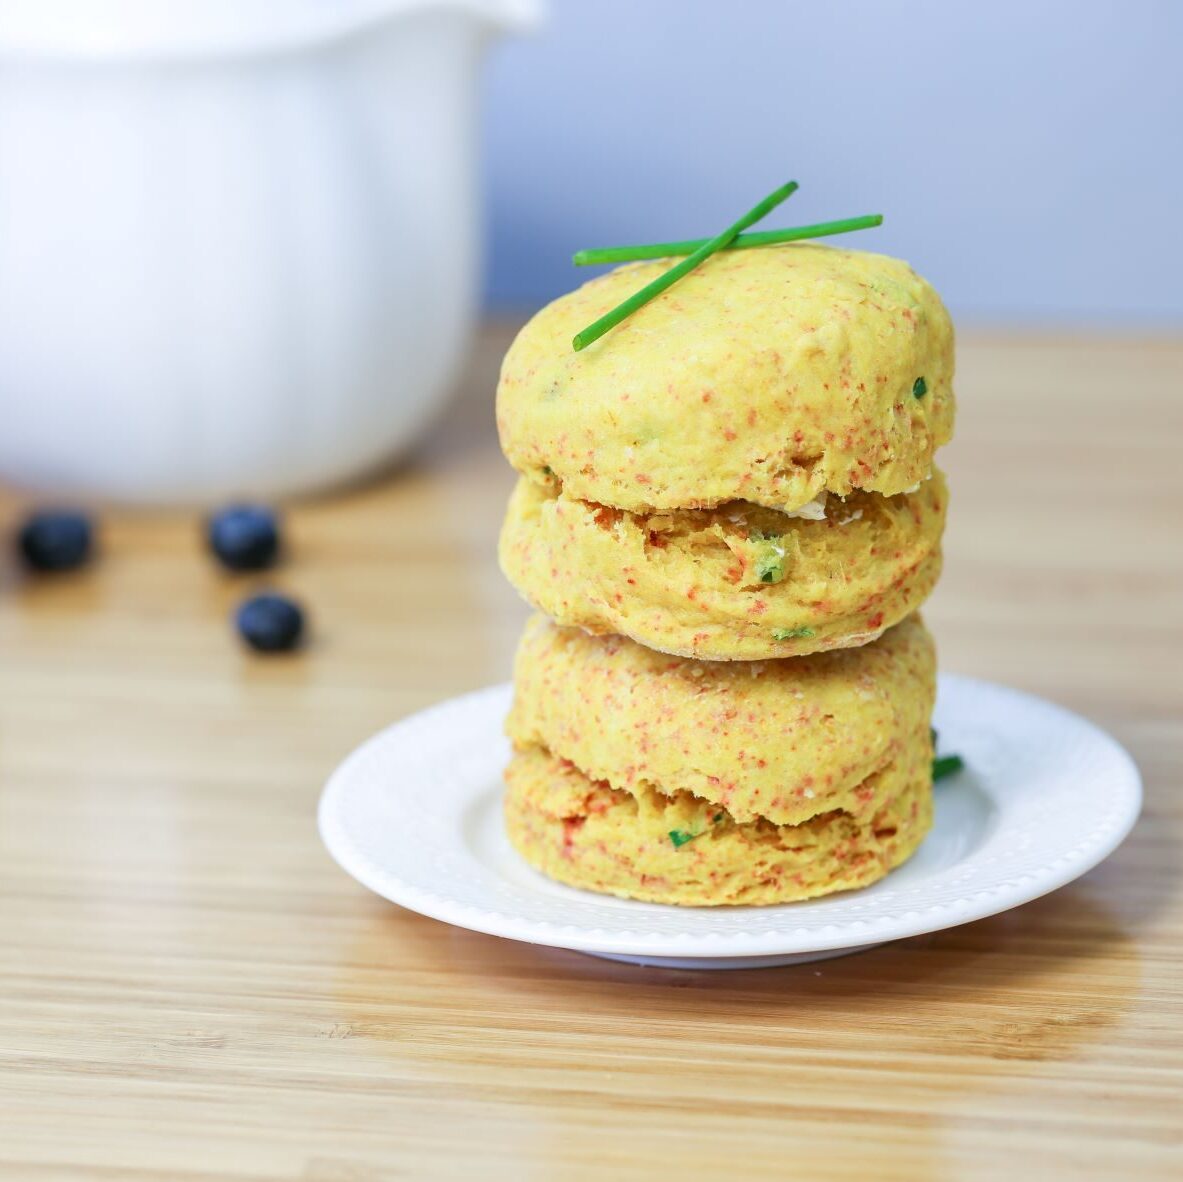
Vegan cheese and chive scones
Firm on the outside and delicate on the inside, these melt-in-your-mouth savoury scones combine the classic tangy flavours of cheese and chives,...